‘Firebase’ カテゴリーのアーカイブ

aikawa

AndroidのPush通知のバック/フォアグラウンド処理でページ移動

前回はflutter_local_notificationsでフォアグラウンド通知を試しましたが、今回は続いてバックグラウンド処理やクリックでのページ移動をしてみます。

dartファイル編集

lib/fcm.dart を新規作成

Firebase Cloud Messagingの処理用ファイルを追加します。
主な機能は以下の4つ。

  • globalで使用するAndroidNotificationChannel FlutterLocalNotificationsPlugin GlobalKey 用の変数を定義します。
  • iniFCM()で初期化及び、通知ウィンドウタップ時に処理する関数onDidReceiveNotificationResponseを指定・作成します。
  • バック/フォアグラウンド時の処理をするdispMessage()を作成します。
  • class MessageViewはタップ時、バックグラウンドから復帰時に移動するページです(簡易的にテキストのみにしています)。
import 'package:firebase_messaging/firebase_messaging.dart';
import 'package:flutter/material.dart';
import 'package:flutter_local_notifications/flutter_local_notifications.dart';

// Params
late AndroidNotificationChannel channel;
late FlutterLocalNotificationsPlugin flutterLocalNotificationsPlugin;

final navigatorKey = GlobalKey<NavigatorState>(); // NavigatorKeyをグローバルに定義

// 初期化
Future<void> initFCM() async{
  final fcmToken = await FirebaseMessaging.instance.getToken(); // FCMトークンの取得
  print('FCM Token: $fcmToken');

  // local notificaitons
  channel = AndroidNotificationChannel(
    'high_importance_channel', // id
    'High Importance Notifications', // title
    description: 'This channel is used for important notifications.', // description
    importance: Importance.max,
  );

  // init
  flutterLocalNotificationsPlugin = FlutterLocalNotificationsPlugin();
  // request permission Android 13
  await flutterLocalNotificationsPlugin.resolvePlatformSpecificImplementation<
    AndroidFlutterLocalNotificationsPlugin>()?.requestNotificationsPermission();
  // create channel
  await flutterLocalNotificationsPlugin.resolvePlatformSpecificImplementation<
    AndroidFlutterLocalNotificationsPlugin>()?.createNotificationChannel(channel);

  // onTap
  const AndroidInitializationSettings initializationSettingsAndroid =
    AndroidInitializationSettings('launch_background');
  const InitializationSettings initializationSettings =
    InitializationSettings(android: initializationSettingsAndroid);
  await flutterLocalNotificationsPlugin.initialize(initializationSettings,
    onDidReceiveNotificationResponse: onDidReceiveNotificationResponse
  );

  // フォアグラウンド
  FirebaseMessaging.onMessage.listen((RemoteMessage message) {
    dispMessage('Fore', message);
  });

  // バックグラウンド
  FirebaseMessaging.onMessageOpenedApp.listen((RemoteMessage message) {
    dispMessage('Back', message);
  });
}

// 通知表示
void dispMessage(String mode, RemoteMessage message){
  print('$mode Message notification: ${message.notification?.title} / ${message.notification?.body}');
  print('$mode Message data: ${message.data}');

  //
  if(mode == 'Fore'){
    RemoteNotification? notification = message.notification;
    AndroidNotification? android = message.notification?.android;
    if (notification != null && android != null) {
      flutterLocalNotificationsPlugin.show(
        notification.hashCode,
        notification.title,
        notification.body,
        NotificationDetails(
          android: AndroidNotificationDetails(
            channel.id,
            channel.name,
            channelDescription: channel.description,
            icon: 'launch_background',
          ),
        ),
        payload: '/message',
      );
    }
  }else if(mode == 'Back'){
    final Map<String, RemoteMessage> args = {'message': message};
    navigatorKey.currentState?.pushNamed('/message', arguments: args);
  }
}

// タップ時
void onDidReceiveNotificationResponse(NotificationResponse details) {
  print('Message pressed');
  //
  final String? payload = details.payload;
  if(payload is String){
    final Map<String, NotificationResponse> args = {'details': details};
    navigatorKey.currentState?.pushNamed(payload, arguments: args);
  }
}


//
class MessageView extends StatelessWidget{
  const MessageView({super.key});

  @override
  Widget build(BuildContext context) {
    //
    String text = '';
    final Map<String, dynamic>? args = ModalRoute.of(context)?.settings.arguments as Map<String, dynamic>?;
    if(args is Map<String, dynamic>){
      for(var key in args.keys){
        if(key == 'details'){
          final NotificationResponse details = args[key];
          print('NotificaitonResponse.id: ${details.id}');
          text = 'Accept details';
        }else if(key == 'message'){
          final RemoteMessage message = args[key];
          print('RemoteMessage title = ${message.notification?.title}');
          text = 'Accept message';
        }
      }
    }
    //
    return Text('Message Page\n$text');
  }
}

lib/main.dart

importを以下のように変更(test202502はflutter create時のプロジェクト名に変更)。

import 'package:flutter/material.dart';
import 'package:firebase_core/firebase_core.dart';
import 'package:firebase_messaging/firebase_messaging.dart';
import 'package:test202502/firebase_options.dart';
import './fcm.dart';

main()を以下のように変更。

void main() async {
  WidgetsFlutterBinding.ensureInitialized();

  await Firebase.initializeApp(options: DefaultFirebaseOptions.currentPlatform); // Firebaseの初期化
  await initFCM();
  // run
  runApp(const MyApp());
}

class MyAppのbuild()のhomeを消して、routesとnavigatorKeyを追加。

      //home: const MyHomePage(title: 'Flutter Demo Home Page'),
      routes: {
        '/': (context) => MyHomePage(title: 'Flutter Demo Home Page'),
        '/message': (context) => MessageView(),
      },
      navigatorKey: navigatorKey,

ビルド

前回のプロジェクト同様、android/app/build.gradle.kts を編集したらビルド&プレイ。

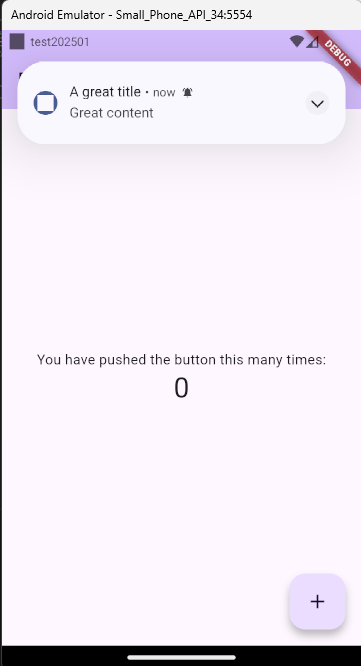
画面が表示されたら、〇等をタップしてホーム画面に戻ります。
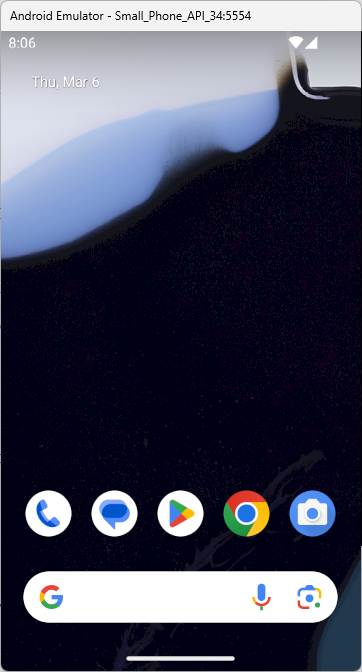
通知を受けると音が鳴るので、上部バーをスライド表示させると、通知が来ています。
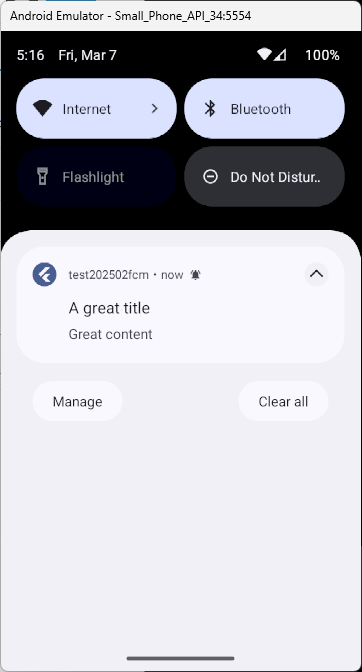
通知をタップすると、内部でonMessageOpenedAppが動作して、dispMessage()を実行。
/messageページに、messageを渡して移動します。
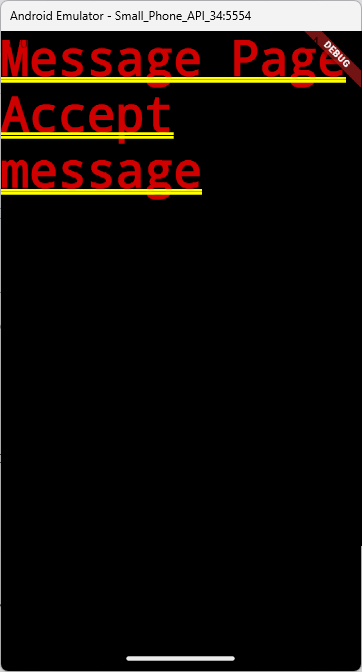
移動すると、引数にmessageを受け取ったので、Message Page Accept messageと表示されます。


◁を押して元の画面に戻します。
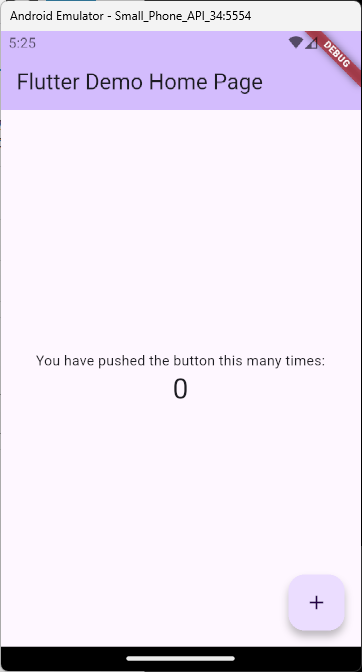
今度はこの画面を表示した状態で通知を受け取って、表示されたウィンドウをタップしてみます。
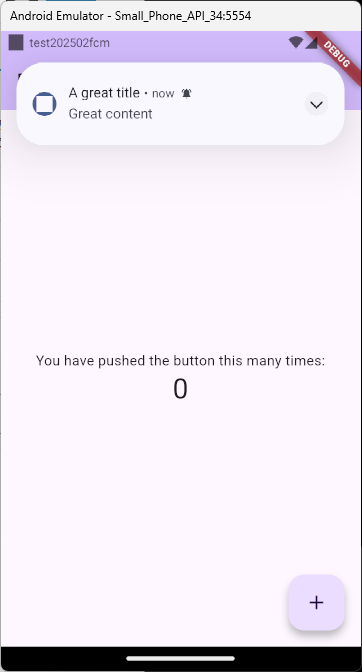
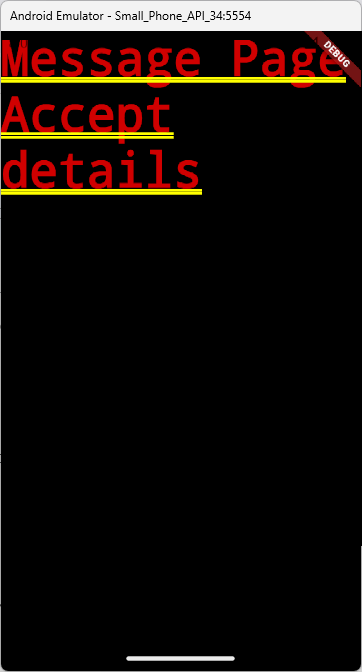
ウィンドウのdetailsを引数として受け取ったので、今度はMessage Page Accept detailsと表示されます。
aikawa

Androidでflutter_local_notificationsを使う

AndroidでFirebase Cloud Messagingの表示に、flutter_local_notificationsを使ってみます。
とりあえずフォアグラウンドだけ。

Flutterプロジェクト作成

前回同様 flutter createしたものを使います。
createからflutterfireで設定する所までは省略。

flutter_local_notifications 関連のパッケージを追加します。

flutter pub add firebase_core
flutter pub add firebase_messaging
flutter pub add flutter_local_notifications

ファイル編集

lib/main.dartを編集

importを以下のように追加します。
test202502は、flutter create時のプロジェクト名に変更します。

import 'package:flutter/material.dart';
import 'package:firebase_core/firebase_core.dart';
import 'package:firebase_messaging/firebase_messaging.dart';
import 'package:flutter_local_notifications/flutter_local_notifications.dart';
import 'package:test202502/firebase_options.dart';

main()を編集。

void main() async {
  WidgetsFlutterBinding.ensureInitialized();
  try{
    await Firebase.initializeApp(options: DefaultFirebaseOptions.currentPlatform); // Firebaseの初期化

    // get token
    final fcmToken = await FirebaseMessaging.instance.getToken(); // FCMトークンの取得
    print('FCM Token: $fcmToken');


    // local notificaitons
    const AndroidNotificationChannel channel = AndroidNotificationChannel(
      'high_importance_channel', // id
      'High Importance Notifications', // title
      description: 'This channel is used for important notifications.', // description
      importance: Importance.max,
    );
    // init
    final FlutterLocalNotificationsPlugin flutterLocalNotificationsPlugin = FlutterLocalNotificationsPlugin();
    // request permission Android 13
    await flutterLocalNotificationsPlugin.resolvePlatformSpecificImplementation<
      AndroidFlutterLocalNotificationsPlugin>()?.requestNotificationsPermission();
    // create channel
    await flutterLocalNotificationsPlugin.resolvePlatformSpecificImplementation<
      AndroidFlutterLocalNotificationsPlugin>()?.createNotificationChannel(channel);


    // show message
    FirebaseMessaging.onMessage.listen((RemoteMessage message) {
      print('Fore Message notification: ${message.notification?.title} / ${message.notification?.body}');
      print('Fore Message data: ${message.data}');
      //
      RemoteNotification? notification = message.notification;
      AndroidNotification? android = message.notification?.android;
      if (notification != null && android != null) {
        flutterLocalNotificationsPlugin.show(
            notification.hashCode,
            notification.title,
            notification.body,
            NotificationDetails(
              android: AndroidNotificationDetails(
                channel.id,
                channel.name,
                channelDescription: channel.description,
                //icon: android.smallIcon,
                icon: 'launch_background',
              ),
            ));
      }
    });
    FirebaseMessaging.onMessageOpenedApp.listen((RemoteMessage message) { // バックグラウンド
      print('Back Message notification: ${message.notification?.title} / ${message.notification?.body}');
      print('Back Message data: ${message.data}');
    });
  }catch (e){
    print(e);
  }
  // run
  runApp(const MyApp());
}

android/app/build.gradle.kts を編集

flutter local notificationsのページに記載が有るのですがktsでない方式なので、そのままでは駄目でした。
android{}ブロック内の各ブロック内に追加・変更します。
isCoreLibraryDesugaringEnabled , multiDexEnabled は無いので追加、それ以外は変更になると思います。

// android{}内で追加・変更
   compileOptions {
       // For AGP 4.1+
       isCoreLibraryDesugaringEnabled = true
       // Sets Java compatibility to Java 8
       sourceCompatibility = JavaVersion.VERSION_1_8
       targetCompatibility = JavaVersion.VERSION_1_8
   }
   kotlinOptions {
       jvmTarget = "1.8"
   }
   defaultConfig {
       multiDexEnabled = true
   }

それから、dependencies{}ブロックは多分無いので追加します。

dependencies {
   // For AGP 7.4+
   coreLibraryDesugaring("com.android.tools:desugar_jdk_libs:2.0.3")
}

後は、現バージョンでは、ndkVersionが古いよとWarningが出るので、出た最低バージョンに合わせて書き直します。
※sdkVersionも34以上が必要ですが、今は34以上になっているので変更不要なようです。

    ndkVersion = "27.0.12077973"

ビルド


VSCodeでターゲットをAndroidにしてmain,dartから▷を押してビルド&プレイ。
起動後にPush通知の許可選択のダイアログが出るので、Allow(許可)を選択します。
その後、VSCodeのコンソールに出ているFCM TokenをコピーしてPush通知を行うと、通知が画面上部に表示されました。

aikawa

flutter createしたプロジェクトのAndroidでFirebase Cloud Messagingを受信する

前回は用意されたサンプルに対して通知を行いましたが、じゃあ1から作る時はどうするの?
という疑問が。
という事で、flutter createで作ったプロジェクトで、使えるようにしてみます。
※今回は最小限で、画面は作らず受信したものをコンソールにprintするだけです。


flutter プロジェクトを作る

早速適当にflutterプロジェクトを作ってみます。

flutter create test202502
cd test202502


作ったら、firebase関連の2パッケージを追加。


flutter pub add firebase_core
flutter pub add firebase_messaging


flutterfireを使う


・・・んですが、現バージョン(Flutter 3.29, flutterfire_cli 1.0.1)ではとても残念な事態を引き起こしていて、Flutter側がgradleの拡張子を.ktsに切り替えているのに、flutterfire側が追従出来ていないのか、configureに失敗します。
flutterfire捨てた(代わりにこっち使え)って事にならなければ良いんですが、今後どうするんでしょうね。

色々と調べた結果、内部的にエラーが出てても*.gradle.ktsをコピーして、.ktsを消したファイルを置いておけば通るようです(空のファイルだと失敗する)。
Windowsならcopyコマンドで出来ます。


copy android\build.gradle.kts android\build.gradle
copy android\app\build.gradle.kts android\app\build.gradle
copy android\settings.gradle.kts android\settings.gradle


ここで本来のconfigureを漸く実施。


flutterfire configure
# firebase project 選択
# platform 選択
# android app id入力 (例:com.example.test202502)


成功したら、copyで作成した*.gradleファイルは必ず消しておきます(今度はbuildに失敗するので)。

lib/main.dartファイル編集

importに以下を追加します。

import 'package:firebase_core/firebase_core.dart';
import 'package:firebase_messaging/firebase_messaging.dart';
import 'package:test202502/firebase_options.dart';

main(){…}を次のように書き換えます。

void main() async {
  WidgetsFlutterBinding.ensureInitialized();
  try{
    await Firebase.initializeApp(options: DefaultFirebaseOptions.currentPlatform); // Firebaseの初期化

    final fcmToken = await FirebaseMessaging.instance.getToken(); // FCMトークンの取得
    print('FCM Token: $fcmToken');

    FirebaseMessaging.onMessage.listen((RemoteMessage message) { // フォアグラウンド
      print('Fore Message notification: ${message.notification?.title} / ${message.notification?.body}');
      print('Fore Message data: ${message.data}');
    });

    FirebaseMessaging.onMessageOpenedApp.listen((RemoteMessage message) { // バックグラウンド
      print('Back Message notification: ${message.notification?.title} / ${message.notification?.body}');
      print('Back Message data: ${message.data}');
    });
  }catch (e){
    print(e);
  }
  // run
  runApp(const MyApp());
}

ビルドして実行

前回同様、ターゲットにAndroidを選択して、main.dartの右上に出ている、▷ボタンを押します。
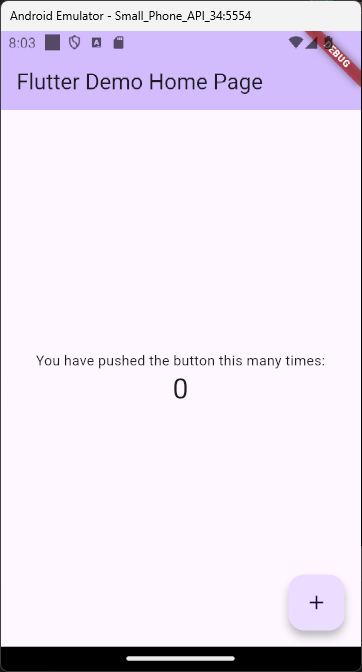
デモ用画面が表示されますが、画面には何も変更を加えていないので、このままで良いです。

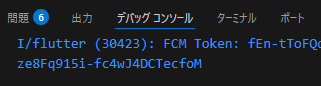
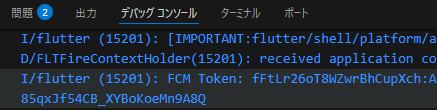
VSCodeのデバッグコンソールを見ると、FCM Tokenの値が表示されているのでコピーします。

通知

前回のflutterfireのexampleとfirebase projectが同じだった場合は、scripts/send-message.jsのtokenを書き換えて実行しても良いですし、別途curlで送信しても良いです。
通知が成功すると、デバッグコンソールに以下のような感じに表示されます。

D/FLTFireMsgReceiver(21750): broadcast received for message
I/flutter (21750): Fore Message notification: A great title / Great content
I/flutter (21750): Fore Message data: {foo: bar}

この例は最低限で受信するまでですが、ここから通知を表示する画面を作って行く事になります。

aikawa

Firebase Cloud MessagingをAndroidで利用する

前回のブラウザで利用するで、AndroidのChromeを使えば通知を送れますが、今回はアプリで利用する方法です。
https://pub.dev/packages/firebase_messaging/example
こちらの例に従い、Flutterを使って、Androidアプリで通知を受信してみます。
(なお、iOSは自分の開発環境に無いので、他の方が書いてくれると良いな)

Firebase Consoleでやる事


https://console.firebase.google.com/
まずは、適当なプロジェクトを選ぶか、作成します。
その後、上部にある「アプリを追加」からAndroid用アプリを選択します。


アプリの登録で、Androidパッケージ名を、各自の命名規則に従って入力。
ニックネームやSHA証明書は、今回は入力しなくて構いません。アプリの追加を押します。


構成ファイルをダウンロードして追加する、ですが一応ダウンロードしておきますが、flutterfireが作ってくれるので今回は不要だったり。次へを押します。


Firebase SDKもflutterfireがやってくれるので、特に何もする事なく次へ。


コンソールに進むで終了です。


vapidKeyの生成


設定のCloud Messagingタブで下部ウェブプッシュ証明書のキーペア(vapidKey)を生成しておきます。
※(前回と同じプロジェクトを使う等で)既に作成済なら不要です。


Firebase Admin SDK


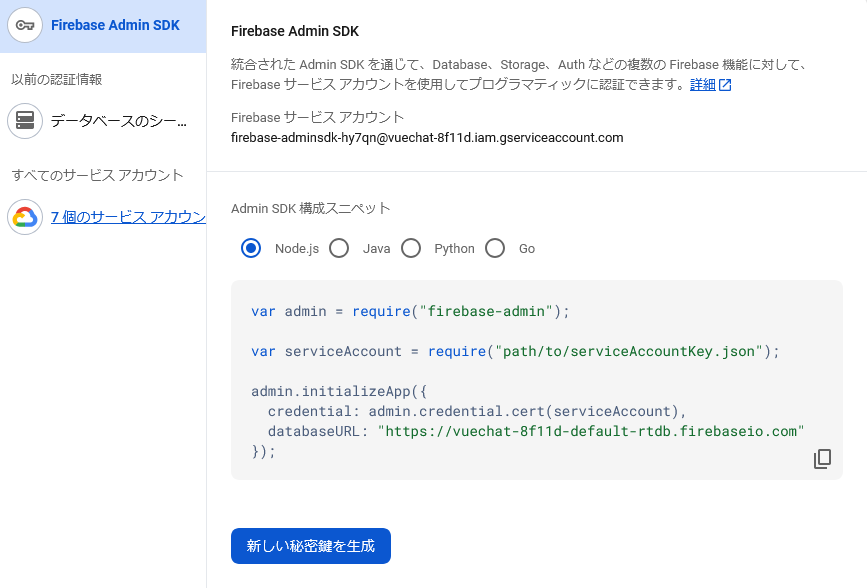
サービスアカウントタブを選択し、Firebase Admin SDKの秘密鍵を生成します。
既に生成済なら、以前ダウンロードしたjsonファイルを利用します(紛失した場合は、再度新しい秘密鍵を生成する必要が有るようです)。
ここでダウンロードされるjsonは、送信用に使用します。

Flutterでやる事

FlutterとAndroidのエミュレータか実機を使えるようにした後で、melosをactivate。

flutter pub global activate melos

flutterfire_cliがまだの場合はそちらも。

dart pub global activate flutterfire_cli

githubからflutterfireを取って来て、melosを実行。

firebase_messaging/firebase_messaging/exampleでflutterfire configureします。

git clone https://github.com/firebase/flutterfire
cd flutterfire
melos bootstrap

cd ./packages/firebase_messaging/firebase_messaging/example
flutterfire configure

途中の質問で、上記で操作したFirebaseプロジェクトを選択します(Create new projectと聞かれたらNoで)。
これで、自分のFirebase Project用のconfigファイルを作ってくれます。

後は、「token_monitor.dart」を開き、「vapidKey」をFirebase Consoleで設定したものに変更します。

Android用にビルドして起動

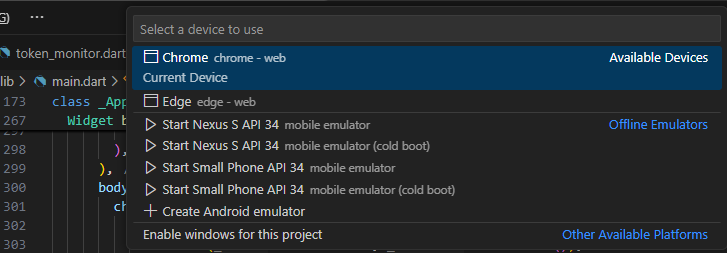
VSCodeならmain.dartを開き、デフォルトでは左下にChromeとかEdgeとか表示されていると思いますがそれをクリックすると上部にどのプラットフォームで実行するか選択が表示されます。

Android端末を選択し(Emulatorで実行するつもりでまだ作成していないなら、Create Android emulatorで作成して)起動して、左下が選択したAndroidになった事を確認します。

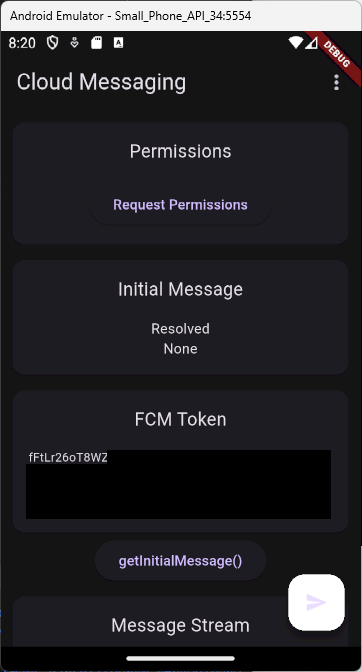
VSCode右上の▷を押すと、長いビルドが始まって、終わるとアプリが起動します。

FCM Tokenの欄に表示されている文字列を選択してコピーするか、VSCodeのデバッグコンソールに、FCM Token: と表示されている箇所をコピーして保存しておきます。

通知を送ってみる

前回同様curlでも送る事が出来ますが、exampleから送信する事も出来ます。
・scripts/ フォルダにFirebase Admin SDKで生成したjsonファイルを、google-service.jsonにリネームして配置します。

・send-message.jsを開き、const token =”の中身を、さっきAndroidで取得したFCM Tokenの中身に入れ替えます。


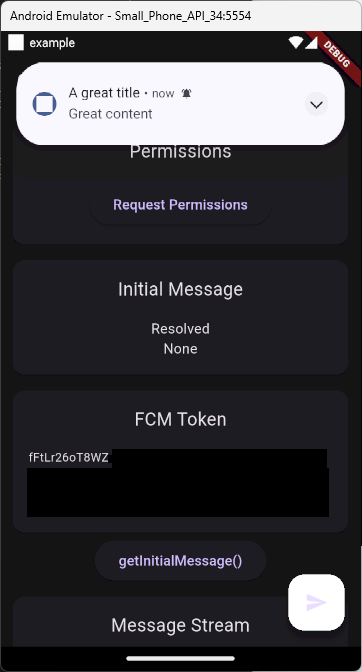
・ターミナルで、node scripts/send-message.jsを実行すると、Androidに通知が行きます。

aikawa

Firebase Cloud Messaging をブラウザで利用する

AndroidやiOSのアプリで、Push通知をするのによく使うFirebase Cloud Messagingですが、ブラウザでも使う事が出来るらしいので、試してみました。
こちらの記事を参考にしています。

大量の通知を試したい時に、AndroidやiOSアプリをインストールさせなくて済むので、検証の助けになるかも知れません(アプリの動作を試すのには向いていませんが)。

※試すには、https接続可能なサーバが必要になります(localhostでも可能なようですが、大量の通知を試すには、誰からでもアクセス出来た方が良いと思うので)。

Webアプリの登録

Firebase Consoleでプロジェクトを選択、あるいは作成します。
ブラウザを使うのでアプリを追加の中から、ウェブを選択。


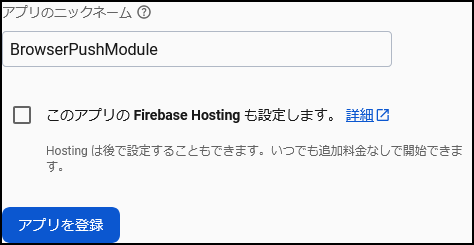
アプリ名を適当に入れて、アプリを登録を押します。
Firebase Hostingを使いたいなら、設定にチェックを入れて下さい。

Firebase SDKの追加

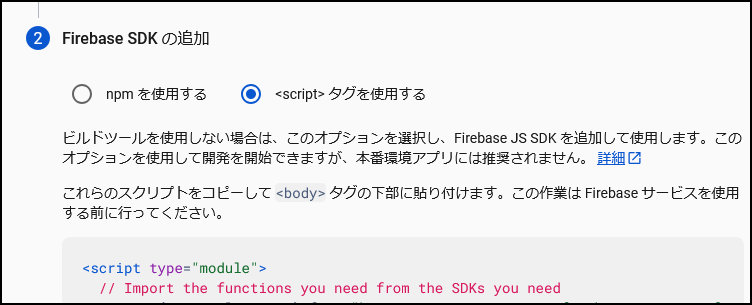
Firebase SDKの追加ですが、const firebaseConfig = {…}; の部分をコピーしておきます。

このfirebaseConfigの部分は、次のVAPID Keyと一緒に、ブラウザのToken登録画面で使用します。
コピーし忘れたら、設定>全般タブ>マイアプリ>ウェブアプリ>[アプリ名]からコピーできます。

最下部の、コンソールに進む、で完了です。

鍵ペア作成(VAPID Key)

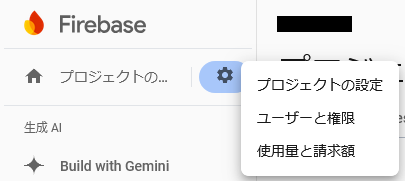
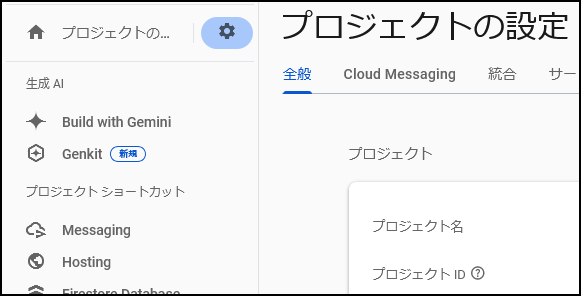
左上歯車アイコンの、プロジェクトの設定を選択します。

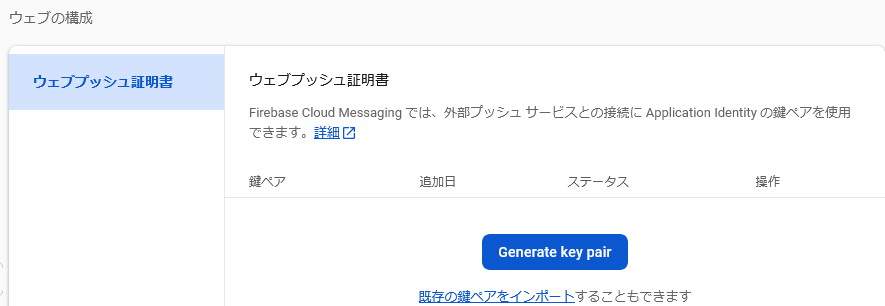
Cloud Messagingタブを選んで、下部のウェブの構成でGenerate Key Pairを押して、ここで表示される鍵ペアをコピーします。秘密鍵の方は不要です。

これも、ブラウザのToken登録画面で使用します。

この時点で、ブラウザのTokenを取得する事が出来るようになりました。

Firebase Admin SDK

続いて、サービスアカウントタブを選択し、Firebase Admin SDKの秘密鍵を生成します。

上のFirebase SDKはTokenの取得に使いますが、このFirebase Admin SDKはPush通知に使います。

新しい秘密鍵を生成ボタンを押して、警告が出ますが生成を選択すると、jsonファイルがダウンロードされます。

と言っても秘密鍵の作成が目的なので、今回このファイルは使いません。

ブラウザからToken登録

httpsでアクセス可能な場所に、以下のhtmlを配置します。

※firebaseConfigとVAPID_PUBKEYを、
Firebase SDKの追加で取得したfirebaseConfig、
鍵ペア作成(VAPID Key)で作成された値
に入れ替えて下さい。

<!DOCTYPE html>
<html>
<head>
<meta name="viewport" content="width=device-width, initial-scale=1.2" />
<title>FCM Token登録</title>
<script type="module">
// Import the functions you need from the SDKs you need
import { initializeApp } from "https://www.gstatic.com/firebasejs/11.2.0/firebase-app.js";
import { getAnalytics } from "https://www.gstatic.com/firebasejs/11.2.0/firebase-analytics.js";
import { getMessaging, getToken } from "https://www.gstatic.com/firebasejs/11.2.0/firebase-messaging.js";
// TODO: Add SDKs for Firebase products that you want to use
// https://firebase.google.com/docs/web/setup#available-libraries

// Your web app's Firebase configuration
// For Firebase JS SDK v7.20.0 and later, measurementId is optional
const firebaseConfig = {
// Firebase SDKの追加で取得したfirebaseConfigで上書き
};

// Initialize Firebase
const app = initializeApp(firebaseConfig);
const analytics = getAnalytics(app);

// 登録
const btn = document.getElementById('regist');
btn.onclick = function(){
console.log("clicked");
var el = document.getElementById("username");
if (!("Notification" in window)) {
// ブラウザーが通知に対応しているか調べる
alert("このブラウザーはデスクトップ通知には対応していません。");
}else if(el.value.length == 0){
alert("ユーザー名を入力して下さい。");
} else if (Notification.permission !== "denied") {
Notification.requestPermission().then((permission) => {
const vapidKey = "VAPID_PUBKEY"; // 鍵ペア作成(VAPID Key)で作成された値
const messaging = getMessaging();
try{
// Add the public key generated from the console here.
getToken(messaging, {vapidKey:vapidKey}).then((token) => {
console.log(token);
showToken(token);
});
}catch(e){
console.error(e);
}
});
} else {
alert("Notification permission is denied.");
}
}

function showToken(token){
document.getElementById("box").style.display = "block";
document.getElementById("result").innerHTML = token;
}
</script>
</head>
<body>
<form method="POST" id="form">
<button type="button" id="regist">Push通知登録</button>
</form>
<br>
<div id="box" style="display:none;">
<div>Token: </div>
<div id="result" style="border: solid 1px #CCCCCC; padding: 4px;"></div>
<div> </div>
</div>
</body>
</html>


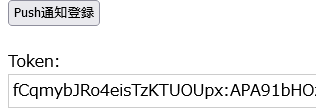
ブラウザでアクセスして、ボタンを押して、トークンが表示されたらOKです。


Tokenはコピーして次で使用します。


ブラウザの挙動について


※FirefoxはToken取得は出来ても、Push通知時にTHIRD_PARTY_AUTH_ERRORを起こす事が有るようです。
プロジェクトAでは全く発生せず、プロジェクトBでは必ず発生すると言う状況でした。
というかこの記事の検証用に追加したプロジェクトで起きて、調べまくりました。
一回目のプロジェクトでは問題なかったのに・・・。
https://stackoverflow.com/questions/72737181/how-do-i-fix-the-problem-behind-third-party-auth-error-when-using-googles-api
https://stackoverflow.com/questions/73218243/fcm-messages-not-being-sent-to-firefox
そんなわけで、こちらでは解決出来ないため、Chromeを使わせるしかない状況のようです。

Edgeはブラウザの設定でサイトの許可が必要でしたが、登録自体は可能でした。
iOSは制限が強く、簡単に使うためにブラウザを、と言う趣旨から外れるので除外しました。
結論Chrome(かEdge)使えになってしまうのは、仕方ないですね。

ブラウザ(OS)Token登録Push通知Firefox (Windows)〇△(別プロジェクトで原因不明のエラー)Google Chrome (Windows)〇〇Edge (Windows)△(ブラウザのセキュリティ設定が必要)〇Chrome(Android)〇〇

Push通知

DocumentRoot直下に/firebase-messaging-sw.jsを作成し、以下を記載します。

// Push通知を受け取ると呼ばれる
self.addEventListener('push', function (event) {
    // メッセージを表示する
    var data = {};
    if (event.data) {
      data = event.data.json();
    }
    var title = data.notification.title;
    var message = data.notification.body;
    event.waitUntil(
      self.registration.showNotification(title, {
        'body': message
      })
    );
});

Bearer Token(access_token)の簡単な取得方法

gcloudコマンドで出来ます。
このtokenの有効期間は(多分)1時間と短いので、数十分後にはまた生成する必要が有ります。
[project name]はFirebase Consoleで選択したプロジェクト名またはIDを指定します。

gcloud auth login
# ブラウザが開くのでGoogleアカウントを選択してログイン
gcloud config set [project name]
gcloud auth print-access-token

curlでPush通知

curl -X POST \
  -H "Authorization: Bearer [access_token]" \
  -H "Content-Type: application/json" \
  -d '{
    "message": {
      "token": "[browser_token]",
      "notification": {
        "title": "Push 通知のタイトル",
        "body": "Push 通知の本文"
      }
    }
  }' \
  "https://fcm.googleapis.com/v1/projects/[project_id]/messages:send"

[access_token]をgcloud auth print-access-tokenで出力された値に、

[browser_token]をブラウザで登録したTokenに、

[project_id]をFirebase のproject idに変更します。

project_idは、Firebase Consoleで、設定>全般タブのプロジェクト IDの値となります。

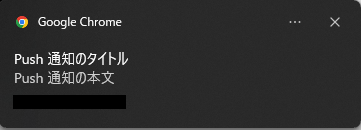
実行時ブラウザを起動していると、次のような通知が来ます。