Archive for the ‘Web’ Category
SolidStartのフォーム送信
- 2023/02/13
- suganuma
- SolidJS
- SolidStart
最近、SolidJSとSolidStartの勉強を始めました。
SolidJSはReactライクなフロントエンドフレームワークですが、仮想DOMを使わない事により軽量・高パフォーマンスを実現しています。
高パフォーマンスな他の理由として、コンポーネント関数は一度しか実行されず、後は該当箇所だけをリアクティブに更新する、というのがあります。
SolidStartは、React.jsに対するNext.jsと同じで、ルーティングやSSR/SSGが可能になります。2023年2月現在、バージョン0.2.20でまだβ版です。
SolidStartのGetting Startedを読んでてこれは便利そうだなと思ったのが、クライアントとサーバ間のデータのやり取りで使われるActionsです。
cordova でプラットフォーム固有の orientation を指定する
- 2015/12/18
- shun
最近ハイブリッドアプリを検討する機会があり、cordova 由来のプロジェクト、PhoneGap や ionic 等を触っています。
さて、これらのアプリも基本的には Web の技術で実装するとはいえプラットフォームとの協調を設定する部分はあり、それらが記載されているのがプロジェクトルートにある config.xml です。
よく設定が必要となる項目に画面回転があると思います。アプリの要件で縦固定となることは少なくありません。ゲームであれば横固定となることもあるでしょう。config.xml では以下の項目を指定します。
この orientation にはプラットフォーム固有の値を持たせることが出来、Android であれば一例として sensorLandscape という値があります。sensorLandscape は横固定だが上下はセンサーに従うという設定です。
これをドキュメントに記載されているコードを参考に追記すると、以下のようになります。
これで画面横向き、Android においては sensorLandscape が適用され…るかと思いきや、どうもそうでは無いようです。
少なくとも今試している cordova (v5.4.1) では通常の preference があるとそちらが優先されるようなので、プラットフォーム固有のコードを適用させたい場合は共通の設定は削除する必要があります。
上記でビルドが通り、orientation が適用されます。他プラットフォームでもビルドは可能で、その場合プラットフォーム指定が無ければ default 指定が適用されるようです。
該当箇所っぽいコードを見るとプラットフォーム固有の指定がある場合はそちらを優先させてくれるような実装に見てとれます。恐らく意図しない挙動だとは思うのですが、軽い気持ちで issue でも投げに行くか〜と覗きに行くと JIRA でキッチリやっている様子で思わず身が竦んでしまいました。いい感じに直ってくれるといいんですが…。
baserCMSを3.0.9へアップデートしました(あっさり)
おひさしぶりです。muraveです。
恒例(?)のbaserCMSアップデート話です。
3.0.7にアップデートする時にスマートURLをオンにした状態ではアップデート処理を実行できなかったり(baserCMSを3.0.2から3.0.7へ。ところでカテゴリ名ってまだ簡単に取れないんです?)、その後.htaccesをいじっていたり(URLを統一したくなったので.htaccessで301リダイレクト)したので、不安がありまして、時間が取れる状況になってから作業しました。
リリースから約一週間、先ほど作業したところ
公式に書いてある手順であっさりアップデートできました!
ヽ(=´▽`=)ノばんざ〜い ←絶対何かで引っかかると思っていた人
どんどん扱いやすいCMSになっていると感じました。
そうそう、管理ページのレイアウトが少しかわっているのでアップデート直後少し表示が崩れて見えたというのがありましたがブラウザのキャッシュの問題で、リロードしたらなおりました。
URLを統一したくなったので.htaccessで301リダイレクト
自社サイトにWOVN(https://wovn.io)を導入してみました。
http://www.lancard.com/ にアクセスすると右下にウィジェットが表示されていると思います。今のところほぼ機械翻訳なのでご笑覧ください(ランカードコムが orchid card com と訳されているところに気づいたら直したくらい)。
そんなわけでWOVNの管理ページを見ていたら http://lancard.com/ でのアクセスや http://www.lancard.com/work/index といったindex付きのアクセス(拡張子無しのindexなのはBaserCMS絡みです)が結構あって、URLを統一しないとアカンなぁと思ったのでした。SEO的にも統一したほうが良いとは聞きますし。
Apacheで動かしてるので.htaccessでどうにかします。
www付きに統一して、indexは無しという方針。
RewriteEngine on
#www付きに統一
RewriteCond %{HTTP_HOST} ^lancard\.com
RewriteRule (.*) http://www.lancard.com/$1 [R=301,L]

#indexなしに統一
RewriteCond %{THE_REQUEST} ^.*/index
RewriteRule ^(.*)index$ http://www.lancard.com/$1 [R=301,L]

#BaserCMS
RewriteBase /
RewriteRule ^$ app/webroot/ [L]
RewriteRule (.*) app/webroot/$1 [L]
こんな感じになりました。
Node.jsを使ってチャット
Node.jsを使ってSocket.ioを用いたチャットルームを作成したいと思います
せっかくなので、前回紹介したYeomanを使って作成
generator-socketioというジェネレータがあるようなのでコレを使います。
まずはジェネレータのインストール
XXXXX:chat XXXXX$ sudo npm install -g generator-socketio
Password:
実行するディレクトリをつくったらyoで実行
今回はbootstrap使用、スタイルシートはCSSを使うことにします
XXXXX:workspace XXXXX$ mkdir chat
XXXXX:workspace XXXXX$ cd chat
XXXXX:chat XXXXX$ yo socketio

     _-----_
    |       |
    |--(o)--|   .--------------------------.
   `---------´  |    Welcome to Yeoman,    |
    ( _´U`_ )   |   ladies and gentlemen!  |
    /___A___\   '__________________________'
     |  ~  |
   __'.___.'__
 ´   `  |° ´ Y `

[?] What do you want to call this project? chat
[?] Write a brief description.
[?] What port number would you like to run on? 1337
chat
to run on port - 1337
[?] Do you want to use Bootstrap? Yes
true
[?] In what format would you like the Bootstrap stylesheets? css
css
   create server.js
   create views/index.ejs
   create public/js/app.js
   create Gruntfile.js
   create package.json
   create bower.json
   create .editorconfig
   create .jshintrc
   create .bowerrc
   create .gitignore

~~~
あとはgruntで実行するだけ。あーなんて楽ちん…
XXXXX:chat XXXXX$ grunt
あーbootstrap入れてなかった
Gruntfile.jsを確認した所、public/bowser_componentsにbootstrapファイルを
入れるといいみたいですね
XXXXX:chat XXXXX$ vi Gruntfile.js
~~~
    cssmin: {
      combine: {
        files: {
          'public/css/core.css': 'public/bower_components/bootstrap.css/css/bootstrap.css'
~~~
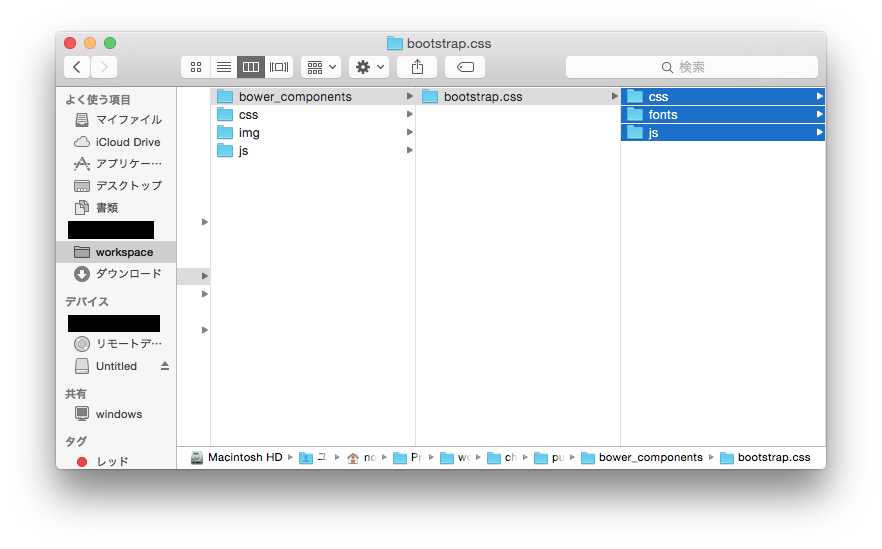
publicにbower_componentsディレクトリを作成し、公式サイトでDLしたbootstrapファイルを入れます
XXXXX:public XXXXX$ mkdir bower_components/
XXXXX:public XXXXX$ mkdir bower_components/bootstrap.css/
もう一回gruntで実行
おおーうまく行った!
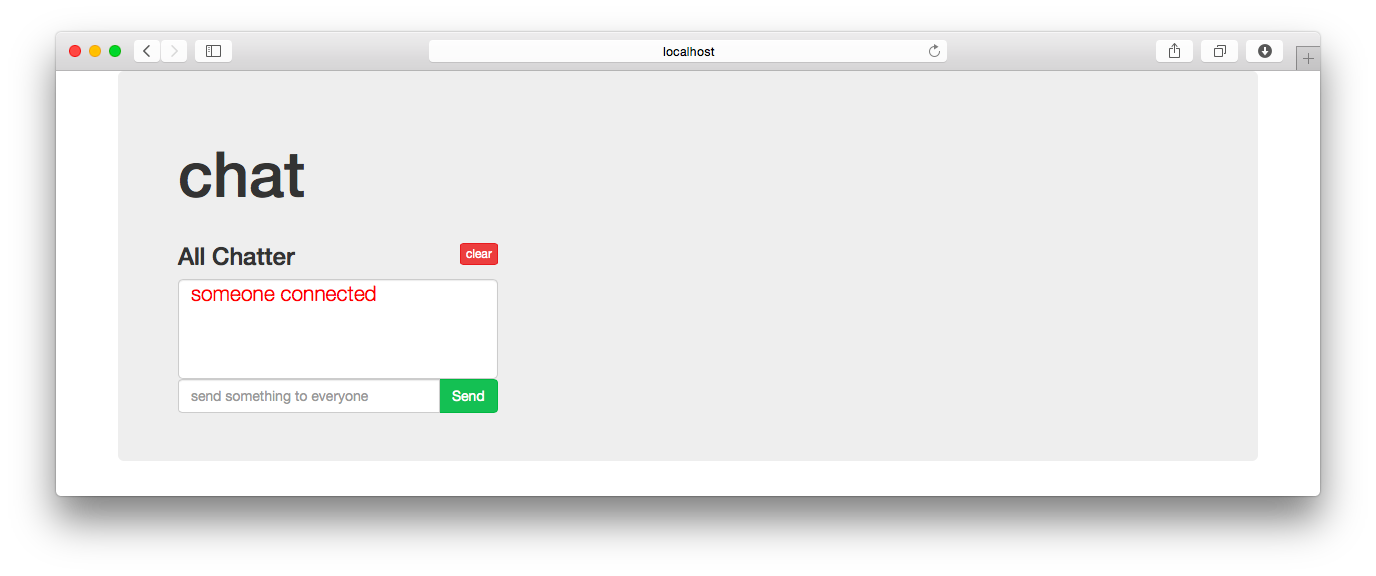
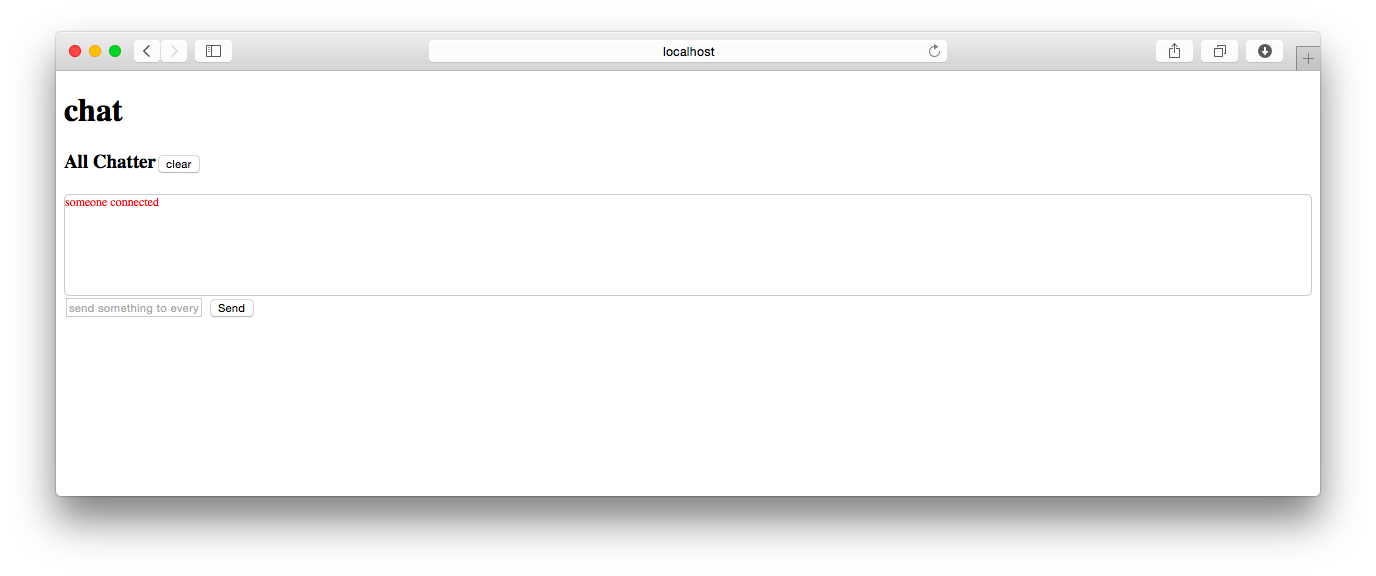
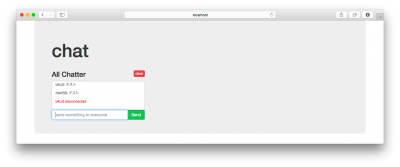
すでに基本的なチャット機能が入っているようで、
もう一つブラウザを開いて文章のやりとりをしてみるときちんと動きます
せっかくなので、少し編集を加えてチャット部屋を用意してみることにします
TOP(localhost:1337)にアクセスしたらランダムなユーザ名と部屋IDを作成し、
各部屋(localhost:1337/id)に飛ぶイメージです
以下編集後
server.js 38行目〜
/*************************************
//
// chat app
//
**************************************/
// express magic
var express = require('express');
var app = express();
var server = require('http').createServer(app)
var io = require('socket.io').listen(server);
var device = require('express-device');
var runningPortNumber = process.env.PORT;
app.configure(function(){
// I need to access everything in '/public' directly
app.use(express.static(__dirname + '/public'));
//set the view engine
app.set('view engine', 'ejs');
app.set('views', __dirname +'/views');
app.use(device.capture());
});
// logs every request
app.use(function(req, res, next){
// output every request in the array
console.log({method:req.method, url: req.url, device: req.device});
// goes onto the next function in line
next();
});
app.get("/", function(req, res){
res.redirect('/'+ random_string(12));
});
app.get('/:room', function(req, res) {
res.render('index', {room: req.params.room, name: random_string(5)});
});
io.sockets.on('connection', function (socket) {
var room; // 部屋ID
var name; // ユーザ名
socket.emit('connected');
socket.on('init', function(data) {
room = data.room;
name = data.name;
socket.join(room);
socket.broadcast.to(room).emit('blast', {msg:""+ name +" connected"});
});
socket.on('blast', function(data, fn){
console.log(data);
io.sockets.to(room).emit('blast', {msg:data.msg});
fn();//call the client back to clear out the field
});
socket.on('disconnect', function() {
socket.broadcast.to(room).emit('blast', {msg:""+ name +" disconnected"});
socket.leave(room);
});
});
server.listen(runningPortNumber);
/**
* ランダムな文字列を返す
*/
function random_string(len) {
var base = 'abcdefghijklmnopqrstuvwxyzABCDEFGHIJKLMNOPQRSTUVWXYZ0123456789';
base = base.split('');
var str = '';
var count = base.length;
for(var i=0; i
index.ejsはnameとroomを追加しただけ
views/index.ejs 52行目〜
app.jsも同じくnameとroom追加
public/js/app.js 13行目〜
// shortcut for document.ready
$(function(){
//setup some common vars
var $blastField = $('#blast'),
$allPostsTextArea = $('#allPosts'),
$clearAllPosts = $('#clearAllPosts'),
$sendBlastButton = $('#send'),
$nameField = $('#name'),
$roomField = $('#room');
socket.emit('init', {name:$nameField.val(), room:$roomField.val()});
$sendBlastButton.click(function(e){
var blast = $blastField.val();
var name = $nameField.val();
if(blast.length){
socket.emit("blast", {msg:name +': '+ blast},
function(data){
$blastField.val('');
});
}
});
ここまで編集したらもう一回grunt実行
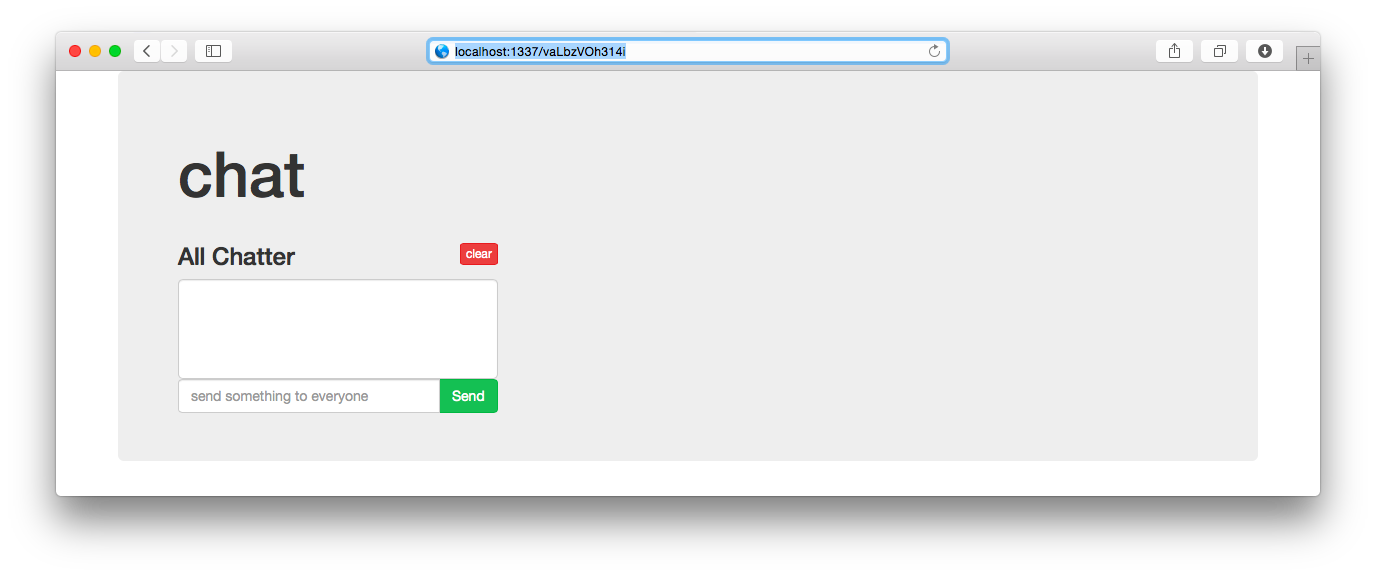
自動的に部屋へジャンプするようになりました

もう一つウィンドウを開き、同じURLにアクセスした後、
元の画面で確認すると部屋に別の人が入室したことを表示してくれています
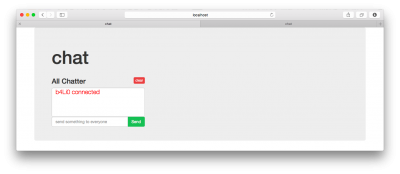
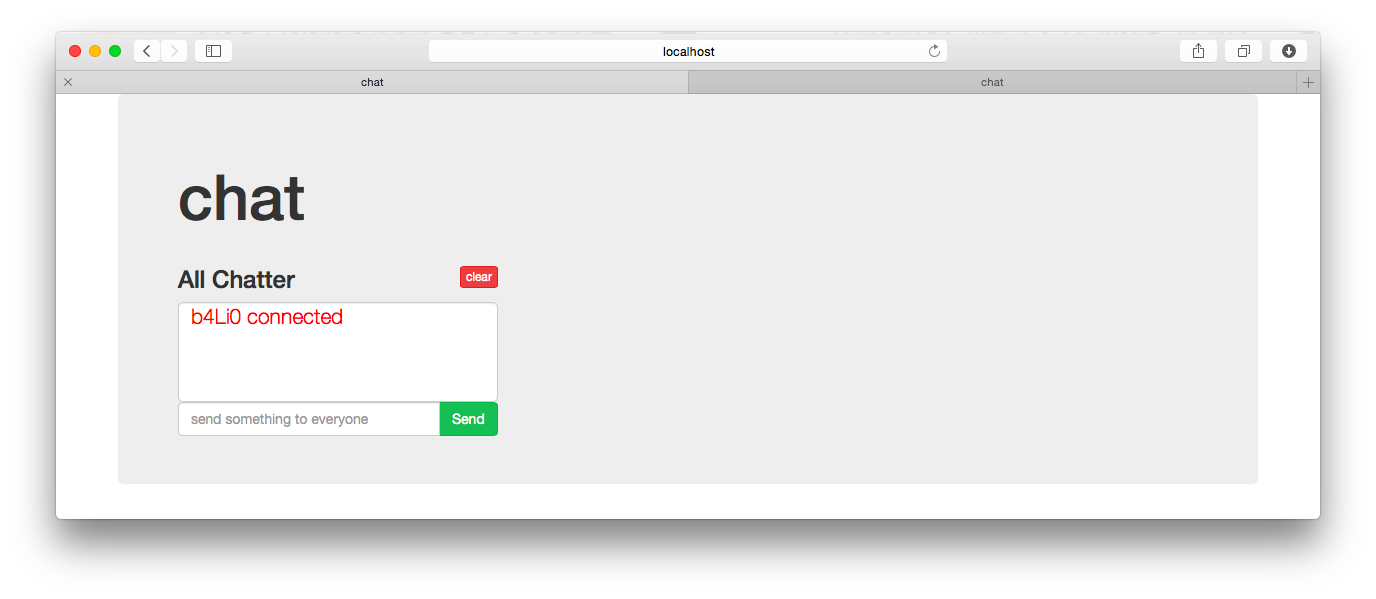
もちろんチャットも出来ますし
ついでに退出を知らせる機能もあります
ウィンドウを消すと"●●● disconnected"と表示されることが確認できます
以上。らくちん。


Yeomanを使ってみる
Yeomanがどういうものなのか詳しくは公式サイトを見ていただくとして、
要はWEBアプリを作る際の基本的な環境構築をパパっとやっちゃいますよ?というものです
気になっていたので、触ってみることにします
環境設定
Node.jsとnpmを入れていることが前提
Yeomanをインストール
$ sudo npm install --global yo bower grunt-cli
確認
$ yo --version && bower --version && grunt --version
Yeomanジェネレータをインストール
AngularJSGeneratorをインストール
$ sudo npm install --global generator-angular
プロジェクトフォルダ作成
$ mkdir yeoman
$ cd yeoman
実行すると今までインストールしたジェネレータのリストが出てくるので、必要な物をインストール
$ yo
? 'Allo XXXX! What would you like to do?
  Run a generator
  Angular
  Karma
  ──────────────
  Update your generators
  Install a generator
❯ Find some help
  Get me out of here!
  ──────────────
今回はAngular generatorを使いたいので、Angularを選択する。
$ yo
? 'Allo XXXX! What would you like to do? Angular

Make sure you are in the directory you want to scaffold into.
This generator can also be run with: yo angular


     _-----_
    |       |    .--------------------------.
    |--(o)--|    |    Welcome to Yeoman,    |
   `---------´   |   ladies and gentlemen!  |
    ( _´U`_ )    '--------------------------'
    /___A___\
     |  ~  |
   __'.___.'__
 ´   `  |° ´ Y `

Out of the box I include Bootstrap and some AngularJS recommended modules.

? Would you like to use Sass (with Compass)? (Y/n)
Saas使う?Bootstrap使う?モジュール使う?等聞かれるので、適時好きなように。今回はこのように選択しました。
? Would you like to use Sass (with Compass)? No
? Would you like to include Bootstrap? Yes
? Which modules would you like to include?
 ◉ angular-animate.js
❯◯ angular-aria.js
 ◉ angular-cookies.js
 ◉ angular-resource.js
 ◯ angular-messages.js
 ◉ angular-route.js
 ◉ angular-sanitize.js
 ◉ angular-touch.js
そしていつもどおりうまく行かない… 権限?
〜〜〜
npm WARN excluding symbolic link build/defs-config.json -> ../defs-config.json
npm ERR! Error: EACCES, mkdir '/Users/XXXX/.npm/debug/2.1.0'
npm ERR!  { [Error: EACCES, mkdir '/Users/XXXX/.npm/debug/2.1.0']
npm ERR!   errno: 3,
npm ERR!   code: 'EACCES',
npm ERR!   path: '/Users/XXXX/.npm/debug/2.1.0',
npm ERR!   parent: 'grunt-usemin' }
npm ERR!
npm ERR! Please try running this command again as root/Administrator.
色々トライしてみた結果キャッシュなくせばいいということだったらしい
$ npm cache clean
いけた!と思ったらこれ。npmが古いらしい。
〜〜〜
npm ERR! Error: ENOENT, open '/Users/XXXXX/Program/workspace/yeoman/node_modules/grunt/package.json'
npm ERR! If you need help, you may report this *entire* log,
npm ERR! including the npm and node versions, at:
npm ERR!

npm ERR! System Darwin 13.4.0
npm ERR! command "/usr/local/bin/node" "/usr/local/bin/npm" "install"
npm ERR! cwd /Users/XXXXX/Program/workspace/yeoman
npm ERR! node -v v0.10.33
npm ERR! npm -v 1.4.28
npm ERR! path /Users/XXXXX/Program/workspace/yeoman/node_modules/grunt/package.json
npm ERR! code ENOENT
npm ERR! errno 34
npm ERR! not ok code 0
npmをもう一度入れなおして実行したらいけました
〜〜〜
└── js-yaml@2.0.5 (esprima@1.0.4, argparse@0.1.15)
app/index.html modified.


     _-----_
    |       |    .---------------------------------------.
    |--(o)--|    |        Bye from us! Chat soon.        |
   `---------´   |                                       |
    ( _´U`_ )    |            The Yeoman Team            |
    /___A___\    | https://github.com/yeoman/yeoman#team |
     |  ~  |     '---------------------------------------'
   __'.___.'__
 ´   `  |° ´ Y `
コレがファイル一覧
$ ls -al
total 88
drwxr-xr-x  15 XXXX  staff   510 11 14 10:00 .
drwxr-xr-x  36 XXXX  staff  1224 11 13 17:48 ..
-rw-r--r--   1 XXXX  staff    38 11 14 09:55 .bowerrc
-rw-r--r--   1 XXXX  staff   415  7  1 07:39 .editorconfig
-rw-r--r--   1 XXXX  staff    11  7  1 07:39 .gitattributes
-rw-r--r--   1 XXXX  staff    52  7  1 07:39 .gitignore
-rw-r--r--   1 XXXX  staff   394  7  1 07:39 .jshintrc
-rw-r--r--   1 XXXX  staff   110  5 15  2014 .travis.yml
-rw-r--r--   1 XXXX  staff  9815 11 14 09:55 Gruntfile.js
drwxr-xr-x  12 XXXX  staff   408 11 14 09:55 app
-rw-r--r--   1 XXXX  staff   414 11 14 09:55 bower.json
drwxr-xr-x  13 XXXX  staff   442 11 14 09:57 bower_components
drwxr-xr-x  29 XXXX  staff   986 11 14 10:00 node_modules
-rw-r--r--   1 XXXX  staff  1066 11 14 10:00 package.json
drwxr-xr-x   5 XXXX  staff   170 11 14 09:55 test
で、gruntを実行
$ grunt serve
Running "serve" task

Running "clean:server" (clean) task

Running "wiredep:app" (wiredep) task
Warning: ENOENT, no such file or directory '/Users/XXXX/yeoman/app/bower.json' Use --force to continue.

Aborted due to warnings.


Execution Time (2014-11-14 01:06:06 UTC)
loading tasks    6ms  ▇▇▇ 1%
wiredep:app    528ms  ▇▇▇▇▇▇▇▇▇▇▇▇▇▇▇▇▇▇▇▇▇▇▇▇▇▇▇▇▇▇▇▇▇▇▇▇▇▇▇▇▇▇▇▇▇▇▇▇▇▇▇▇▇▇▇▇▇▇▇▇▇▇▇▇▇▇▇▇▇▇▇▇▇▇▇▇▇▇▇▇▇▇▇▇▇▇▇▇▇▇▇▇▇▇▇▇▇▇▇▇▇▇▇▇▇▇▇▇▇▇▇▇▇▇▇▇▇▇▇▇▇▇▇▇▇▇▇▇▇▇▇▇▇▇▇▇▇▇▇▇▇▇▇▇▇▇▇▇▇▇▇▇▇▇▇▇▇▇▇▇▇▇▇▇▇▇▇▇▇▇▇▇▇▇▇▇▇▇▇▇▇▇▇▇▇▇▇▇▇▇▇▇▇▇▇▇▇▇▇▇▇ 98%
Total 540ms
うーん・・・なんかbower.jsonのパスが違う
調べてみたところGruntfile.jsに少し編集をいれるといいらしい。
wiredepセクションのcwdを空にしました。
163     // Automatically inject Bower components into the app
164     wiredep: {
165       options: {
166 //        cwd: '<%= yeoman.app %>'
167         cwd: ''
168       },
で、もう一回トライ
$ grunt serve
Running "serve" task

Running "clean:server" (clean) task

Running "wiredep:app" (wiredep) task
app/index.html modified.

Running "concurrent:server" (concurrent) task

    Running "copy:styles" (copy) task
    Copied 1 files

    Done, without errors.


    Execution Time (2014-11-14 01:16:24 UTC)
    loading tasks  3ms  ▇▇▇▇▇▇▇▇▇▇▇▇▇ 27%
    copy:styles    7ms  ▇▇▇▇▇▇▇▇▇▇▇▇▇▇▇▇▇▇▇▇▇▇▇▇▇▇▇▇▇▇ 64%
    Total 11ms

Running "autoprefixer:dist" (autoprefixer) task
File .tmp/styles/main.css created.

Running "connect:livereload" (connect) task
Started connect web server on http://localhost:9000

Running "watch" task
Waiting...
いけた!!!
自動でブラウザが開かれます
baserCMSを2.0.1から2.0.3に更新
弊社サイトで使用しているbaserCMSのバージョンを2.0.1から2.0.3に更新しました。
あっさりサックリ上手く行ったのでホッとしたのですが、動作確認するとブログでの一覧表示でおかしな所が。「≫ 続きを読む」をクリックするまで隠れているはずの詳細が一覧で見えてしまっていました。
あれ〜?と思いつつbaserCMS公式にいくと関係しそうな解決済チケットがありました。
BlogHelper::getPostContent の挙動がおかしい
リビジョン a845999e から更新ファイルを取ってきてファイルを差し替えました。
さぁ〜、どうだ! あれ〜? なおらないな。
しばし悩む。 フォーラムを見に行ったりしつつ。
ああ、そうか。ブログのviewカスタマイズしてるからかも。 そうでした。
lancardというテーマ名の場合ですが、以下の2ファイルをリポジトリのindex.phpの変更内容に合わせて修正したらなおりました。
app/webroot/themed/lancard/blog/default/index.php
app/webroot/themed/lancard/blog/default/archives.php
修正内容はリポジトリの差分を見てもらうのが手っ取り早いですね。
$blog->postContent($post, false, true) と第2引数がfalseに変わってます。
baserCMSの認証をカスタマイズ(WordPressのアカウントでログイン)
baserCMSのバージョンは2.0.1です。
現在弊社のサイトはbaserCMSとWordPress(スタッフブログ)が同居しています。
アカウントの管理を統一したかったのでbaserCMSにWordPressのアカウントでログイン可能なようにbaserCMSの認証をカスタマイズしました(先にWordPressを運用していたのでスタッフのアカウントがWordPressにありますので)。
次のような仕様にしました。
- WordPressのアカウントでbaserCMSにログインした場合、事前に作成したstaffアカウントとしての操作になる。
- 公開ページで表示される名前(氏名)はstaffとする。
- ログイン中、氏名を「staff(WordPressアカウント)」とする。
- 誰が操作したかの記録は欲しいのでダッシュボードの「最近の動き」に by 氏名 と付加して記録する。
")
baserCMSの認証はbcAuthComponent(baser/controllers/components/bc_auth.php)に切り出してありますので、このファイルをappディレクトリの同一階層にコピーしてそのファイルを修正します。元のbcAuthComponentは携帯の簡単ログイン対応になっていたのですが携帯でのログインは必要なかったので全部削除して書き直しって感じになりました。
app/controllers/components/bc_auth.php
App::import('Component', 'Auth', 'Sanitize');
class BcAuthComponent extends AuthComponent {
//WordPressアカウントでstaffとしてログイン murave
function login($data = null) {
$this->__setDefaults();
$this->_loggedIn = false;

$wordpress_id = null;

if (empty($data)) {
$data = $this->data;
}

$model =& $this->getModel();
$alias = $model->alias;
$cnt = $model->find('count',
array('conditions' => array($this->userModel . '.' . $this->fields['username'] => $data['User']['name'])));
if($cnt == 0) {//baserCMSには存在しないユーザー
if($this->_wp_CheckPassword($_POST['data']['User']['name'], $_POST['data']['User']['password'])) {
$wordpress_id = $_POST['data']['User']['name'];
$staff_record = $model->find('first',
array('conditions' => array($this->userModel . '.' . $this->fields['username'] => 'staff')));

$username = $staff_record[$this->userModel][$this->fields['username']];
$password = $staff_record[$this->userModel][$this->fields['password']];
$data = array(
$this->userModel . '.' . $this->fields['username'] => $username,
$this->userModel . '.' . $this->fields['password'] => $password
);
}
}

if ($user = $this->identify($data)) {
if(!is_null($wordpress_id)) {
$user['real_name_2'] = '('.$wordpress_id.')';
}
$this->Session->write($this->sessionKey, $user);
$this->_loggedIn = true;
}
return $this->_loggedIn;

}

/**
 * WordPressユーザー認証を行う。
 */
private function _wp_CheckPassword($wordpress_id, $password) {
//WordPressの関数を使って認証を行ない結果をtrue/falseで返す処理です。
}

}
_wp_CheckPasswordがWordPressに認証させる処理で「肝心な所」ではあるのですが、環境によって異なるはずなので申し訳ありませんが割愛しています。
baserCMSにアカウントが無かったらWordPressに認証させて、WordPressで認証に成功したらstaffというアカウントでbaserCMS側は認証、その場合には $user[‘real_name_2’] = ‘(‘.$wordpress_id.’)’ とreal_name_2に設定してからセッションに書き込んでいます。real_name_1はstaffにしているので操作中の氏名は「staff(WordPressアカウント)」となります。
次に「最近の動き」への記録ですがBaserAppModelのsaveDbLogメソッドで行われていますのでこのメソッドの動作を変更します。baser/models/app_model.phpをappディレクトリの同一階層にコピーしてメソッドを定義すれば上書きできます。
app/models/app_model.php
class AppModel extends BaserAppModel {
function saveDbLog($message) {
// ログを記録する
App::import('Model', 'Dblog');
$Dblog = new Dblog();
$logdata['Dblog']['name'] = $message
.' by '.@$_SESSION['Auth']['User']['real_name_1'].@$_SESSION['Auth']['User']['real_name_2'];
$logdata['Dblog']['user_id'] = @$_SESSION['Auth']['User']['id'];
return $Dblog->save($logdata);
}
}
これで当初予定していたカスタマイズが一通り完了しました。baserCMSはカスタマイズしやすくていいですね。
baserCMS 2系で追加されたテーマヘルパーが便利(だけど要注意)
本日の「忘れないうちに書いとくぜ!baserCMSネタ」のお時間がやってまいりました。
baserCMS 2系でテーマヘルパーが追加されました。
http://basercms.net/functions/theme_helper
弊社サイトはlancardというテーマを作ってその下で構築しています。
現在、その中で、これから追加や編集をしていく予定があり、書き方が複雑だけど規則性がある、「ホームページのピックアップ(上部の画像切替)」と「ウィジェットのバナー表示」についてテーマヘルパーを利用して更新コストを下げています。

参考に、バナー表示用のヘルパーのコードを抽出して貼ります(ピックアップについては複雑なので)。
app/webroot/themed/lancard/helpers/lancard.php
BcBaser->getUrl('/themed/lancard/img/bunner/'.$imgFile, true)
.')';
$this->BcBaser->link(
$title,
$url,
$linkAttributes
);
}
}
?>
使用方法はこんな感じ。
bunner('OSSダウンサイジング', 'downsizing.jpg', '/it-model') ?>
と書くと
OSSダウンサイジング
と出力されます。便利です。
しかし、このテーマヘルパー、注意して扱わないと大変ヒドイ目にあいます。
テーマヘルパー用のディレクトリに「正しいテーマヘルパー以外のファイル」を置くとサイトのルーティングが全滅します。管理ページもアクセス不能! 初めてこの現象に遭遇したときは超ビビリました。
ヘルパーを読み込もうとしてエラーが発生するわけですが、その影響範囲が想定の範囲外!
私がやってしまったパターン
- テーマヘルパー開発中に動作確認しようとしたらサイトが全滅してた。
- テーマヘルパーを更新するときに旧ファイルをlancard.php_oldとリネームしたら全滅。
いかがでしょうか。恐ろしいですね。
しかしこの副作用、次のチケットでかなり解決しそうですので一時的な問題だと思います。
TODO #2604 「テーマヘルパの読み込みはテーマ名のヘルパのみにする」
そうそう、ヘルパー名は上記チケットの内容にしたがってつけておきましょうね。